How to hang our peel & stick wallpaper
STARTING CHECKLIST
- Check you have sufficient rolls to complete the job, allowing for design repeat
- Check all batch & Pattern Numbers Match
- Check all rolls are undamaged & free from misprints errors
- Check all colours match roll to roll & edge to edge
- Let the product acclimatise in the room where it will be applied for a minimum of (48 hours)
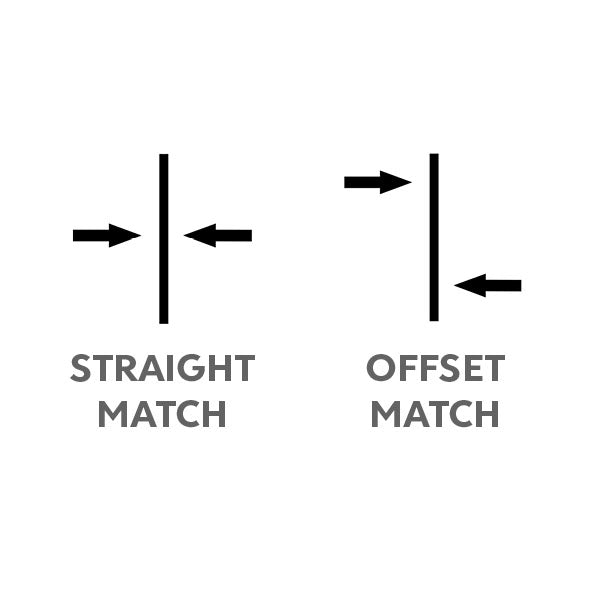
STRAIGHT MATCH wallpaper has a design that matches edge to edge with each drop because the design from left to right across each drop is the same. The match type is indicated by the symbol on your roll.
OFFSET MATCH wallpaper has a design that will match up when every other drop is offset by a specific distance. This distance is indicated on each roll as the length repeat. The match type is indicated by the symbol on your roll.
TOOLS
- Tape Measure
- Spirit Level
- Pencil
- Cloth
- Ruler Utility Knife & Plastic Smoother Set
- Step Ladder
We recommend completing the 'Starting Checklist' and then hanging 3-4 drops before checking again before continuing. Whilst we take every precaution to ensure the product reaches you in a perfect condition, it is your responsibility to check it does not have print errors.
We cannot be held liable for costs incurred due to incorrect hanging technique, or hanging defective wallpaper, if by preliminary inspection the defect would have been found.
PREP YOUR WALL
- Surfaces must be smooth, dry, clean & firm.
- If the wall has been painted the manufacturer would recommend allowing 4-6 weeks for your wall to fully cure.
- Walls the manufacturer wouldn’t recommend for application; Brick / Cinderblock, Unpainted Drywall, freshly plastered, non-stick paint and wallpaper / lining paper.
HANG YOUR PEEL & STICK WALLPAPER
1) Draw a straight vertical line using your spirit level 45cm from the left hand side of your wall. This is a guide for your first length/strip, so it is important for it to be straight.
2) Peel 20-30cm of the back away and apply the front sheet to the top of your wall, allowing for excess to overlap the ceiling. Align the right side of the length/ strip to your pencil mark & press to the wall. Pull the backing away evenly as you press the paper to the wall working from the top to the bottom.
When peeling the backing away be careful around the edges to avoid papercuts and do not stretch the material. This can cause gaps between the seams overtime. Remove the sheet to reposition if required.
3) Using the plastic smoother, run it carefully from the centre outwards to help remove any trapped air bubbles. It is important to use the smoother to ensure the adhesion of the paper to the wall.
4) Using a sharp knife, trim away the excess paper from the top and bottom (and left hand side on the first strip).
5) Continuing with the remaining strips, aligning them to the edge of the previous strips matching the repeat in the wallpaper design.